
Changing your Nissan CVT fluid at home isn’t just about saving money—it’s about extending the life of your transmission and ensuring smoother performance on every drive. CVT (Continuously Variable Transmission) systems require clean, properly leveled fluid to maintain smooth gear shifts and prevent overheating. Over time, CVT fluid breaks down due to heat, friction, and contaminants, which can lead to jerking, slipping, or even total transmission failure if left unchanged.
Doing this at home puts you in control. You get to choose the correct OEM-grade fluid (such as NS-2 or NS-3), follow the right interval, and monitor for early signs of wear. Plus, you avoid the steep costs of dealership service, which often bundles unnecessary upsells into a simple fluid change.
More importantly, Nissan CVT systems are known to be sensitive. That’s why missing a fluid change window can trigger serious long-term issues. By learning the process and doing it correctly, you not only improve your vehicle’s reliability but also build mechanical confidence. On top of that, understanding how your transmission behaves after a fluid change allows you to spot any unusual symptoms before they become expensive problems.
If you want to dive deeper into how transmission issues emerge over time due to fluid neglect, this episode from Nissan Nation Podcast explains why CVT fluid health is critical—especially for models like the Rogue, Altima, and Sentra.
1. Tools and Supplies You’ll Need for a Nissan CVT Fluid Change at Home
Before you begin your DIY CVT fluid change, having the right tools and supplies in place is essential. Missing one item can interrupt the process, or worse, lead to improper fluid levels or a messy cleanup. Start by identifying your Nissan model and confirming the specific fluid type required. Most modern models use NS-3 CVT fluid, while older ones may still require NS-2. Always check your owner’s manual to confirm.
Here’s a breakdown of what you’ll need:
- CVT Fluid (correct type and quantity based on your model)
- Drain pan for capturing old fluid
- Socket wrench set (typically 10mm–19mm)
- Torque wrench (to properly re-tighten the drain bolt)
- Long-neck funnel (for precise pouring)
- Ramps or a jack + jack stands (to safely raise and secure the vehicle)
- Rubber gloves and rags (for safety and cleanliness)
- Optional but recommended: infrared thermometer or OBD2 scanner with live data to check transmission fluid temperature during refill
Getting the fluid quantity right is especially critical. If you underfill, your transmission could overheat. If you overfill, it could foam or create excess pressure. That’s why a measuring container to record how much old fluid was drained is a smart move—simply refill the same amount unless you’re doing a full flush.
For a complete breakdown of how much fluid each Nissan model takes, check out this useful guide on Nissan CVT transmission fluid capacities provided by Nissan Nation Podcast. It’s especially helpful for Altima, Sentra, Versa, and Rogue owners.
Lastly, make sure you’re working in a well-ventilated, level area with enough time to complete the job without rushing. Skipping safety precautions or improvising with tools may lead to mistakes that cost more than a trip to the dealership. Prepare thoroughly—it’s the foundation of a smooth DIY experience.
2. When Should You Change Nissan CVT Fluid?
Knowing when to change your Nissan’s CVT fluid is just as important as knowing how. Timing plays a critical role in preventing premature wear, overheating, and expensive repairs. Contrary to the old myth of “lifetime transmission fluid,” CVT systems demand proactive maintenance—especially in Nissans, where fluid quality directly impacts transmission health.
So, how often should you change it? Most experts and Nissan tech bulletins recommend changing CVT fluid every 60,000 to 90,000 miles, depending on your driving conditions. If you frequently drive in stop-and-go traffic, climb hills, or haul loads, aim for the lower end of that range. These conditions generate more heat, which breaks down fluid faster.
There are also clear signs that your CVT fluid may be nearing the end of its lifespan:
- Sluggish or delayed acceleration
- Whining or humming noises
- RPMs surging without increased speed
- Jerky or uneven gear transitions
- Transmission overheating warning lights
In some Nissan models, there’s no dipstick, so checking fluid levels becomes more complicated. That’s why it’s smart to track mileage and symptoms proactively. Ignoring these signs may result in internal damage, which could trigger Nissan’s well-documented CVT issues—a topic covered in depth on this breakdown of common transmission complaints.
If your vehicle is still under warranty, always check your service schedule to avoid claim denials. Skipping fluid changes can void transmission coverage, especially in newer models like the Rogue, Kicks, and Sentra.
Bottom line: don’t wait for something to go wrong. Stick to a regular interval or change it sooner if symptoms appear. It’s a small investment that protects one of the most expensive components in your car.
3. How to Safely Drain the Old CVT Fluid Without Damaging Your Transmission
Draining old CVT fluid might seem straightforward, but doing it safely and correctly is crucial to avoid damaging your transmission or creating unnecessary mess. Unlike engine oil changes, CVT fluid drains more slowly and requires precision—both in the removal and the refill process.
First, make sure your Nissan is parked on a level surface. Engage the parking brake and let the car cool down for at least 30 minutes if it was recently driven. Working on a hot transmission not only increases the risk of burns but can also lead to false fluid readings. Use ramps or jack stands to safely lift the front of the car—never rely on a hydraulic jack alone.
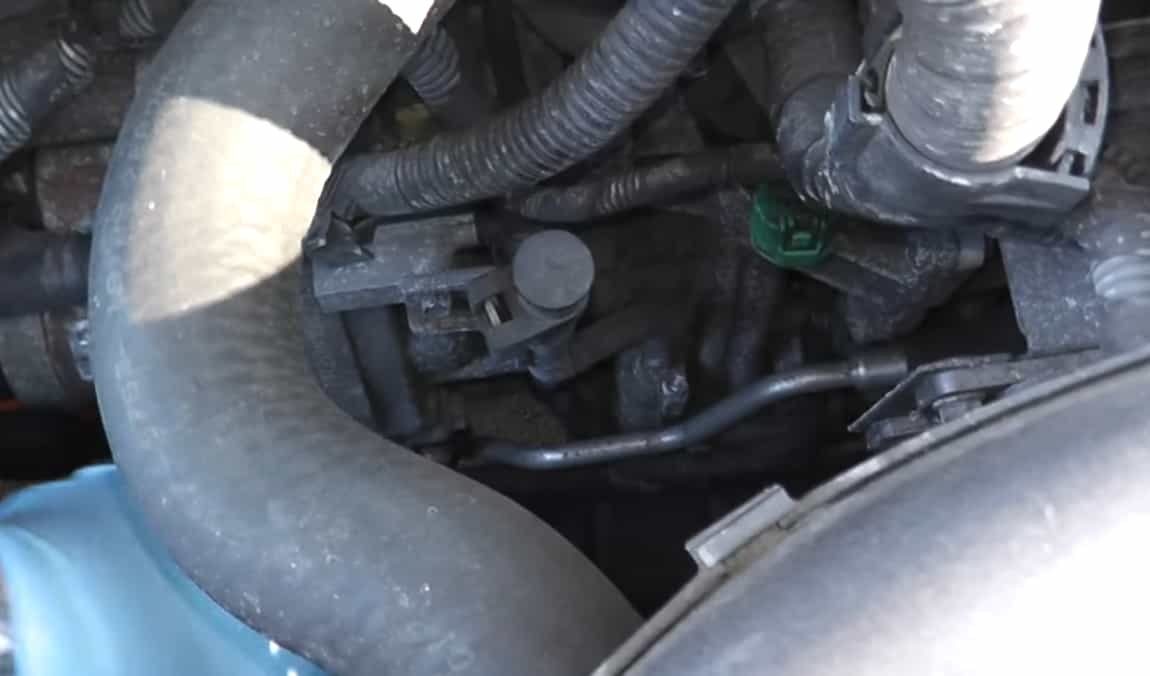
Next, locate the CVT drain plug on the transmission pan. It’s usually near the front middle area, easily identified with a square or hex bolt. Place your drain pan underneath and slowly loosen the plug. Allow the fluid to drain fully—it may take several minutes.
Important: Take note of how much fluid comes out. Use a measuring container or mark the amount visually. This is key for refilling the correct volume later, especially since overfilling or underfilling CVT fluid can cause serious shifting problems or foaming.
Once drained, inspect the old fluid. Healthy CVT fluid is usually reddish or light brown and slightly transparent. If it’s dark, smells burnt, or has metal shavings, that’s a red flag—your transmission may already have internal wear. Take pictures or save a small sample if you’re unsure.
After draining, clean the plug and the sealing area. If your drain plug has a gasket or washer, inspect it and replace if worn. Reinstall the plug and torque it to the manufacturer’s specification—usually around 25–35 ft-lbs for most Nissan models.
Draining is only half the job. Refill must be just as precise, and you’ll also need to verify fluid level at operating temperature. But if this step is done right, you’ve already cleared the most critical hurdle of the DIY fluid change.
4. Replace the CVT Filter and Gasket for Better Long-Term Protection (Optional)
While not always required, replacing the CVT fluid filter and pan gasket during a fluid change can significantly improve long-term transmission performance—especially on higher-mileage Nissans or models prone to CVT issues. Think of it as changing the air filter when replacing engine oil—it’s not mandatory every time, but it optimizes the entire system’s function.
Most Nissan CVT systems are equipped with either an internal screen filter or an external inline filter. For models like the Altima, Murano, and older Sentras, you may need to remove the transmission pan to access the internal filter. This adds a bit of work, but it’s also an opportunity to inspect the inside of the pan for metal shavings or clutch debris—early warning signs of wear or slipping.
Once the pan is off, use a clean rag to wipe away sludge and residue. Replace the internal filter by removing its retaining bolts. Make sure to install a new gasket on the pan before resealing it. Avoid reusing the old one—it can lead to slow leaks or improper sealing over time. Use a torque wrench to reinstall the pan bolts in a cross-pattern to factory specs, usually between 7–10 ft-lbs.
If your vehicle has an external CVT filter, it may look like a small canister near the transmission cooler lines. Replacing it is much simpler and only takes a few minutes—though you’ll likely lose a bit of fluid during the swap, so top off accordingly.
While some newer models don’t require filter replacement every fluid change, it’s a good practice to do so every 60,000 to 100,000 miles—or sooner if you notice shifting hesitation or fluid discoloration. Even if your owner’s manual doesn’t mention it, many independent Nissan techs recommend it as a proactive maintenance step to extend the lifespan of your CVT system.
Bottom line: it’s not just about what you remove—it’s about what you leave behind. A clean filter ensures new fluid can circulate properly and lubricate all components evenly. Skipping this may save time now but cost more later if contamination builds up again too soon.
5. Refill the CVT Fluid with the Right Amount and Method for Optimal Performance
Now that the old CVT fluid is completely drained—and possibly the filter replaced—it’s time to refill your Nissan with fresh fluid. This step requires care, precision, and patience. Using the wrong type, incorrect quantity, or improper refill method can compromise your transmission and even void your warranty.
Start by confirming the exact fluid specification for your model. Most modern Nissans (Altima, Rogue, Sentra, Kicks) require Nissan NS-3 CVT fluid, while some older models may use NS-2. Never mix fluid types, and don’t use universal or aftermarket CVT fluids unless they explicitly meet Nissan’s standards. Your owner’s manual or a trusted OEM database should provide confirmation.
Use a long-neck funnel to pour the fluid through the CVT dipstick tube (if your model has one) or the refill port on top of the transmission. Pour slowly and monitor the amount closely—you should refill the exact volume you drained earlier, unless you’re doing a full flush. For most Nissans, this is between 4–6 quarts during a partial drain-and-fill. Use a measuring container if needed.
Once filled, reinstall the dipstick or cap and start the engine. Let it idle for a few minutes. Then, slowly shift through all gear positions (P-R-N-D-L) and return to Park. This allows the fluid to circulate through the entire transmission system.
Here’s where it gets a bit more advanced: to verify the fluid level accurately, the transmission must be at its normal operating temperature—usually around 170°F (77°C). You can check this using:
- An OBD2 scanner with live temperature data
- An infrared thermometer on the transmission case
- Or, if you have a dipstick model, simply touch the dipstick after idling for 10–15 minutes
Once the correct temperature is reached, check the fluid level. It should fall between the hot and cold markers, depending on the dipstick type. If it’s too low, add fluid slowly. If it’s too high, drain a small amount using the same drain bolt as before.
Do not overfill. CVT systems are sensitive—too much fluid can cause foaming and erratic shifting, while too little fluid results in overheating and gear slippage. Precise level is everything.
If this is your first time doing a CVT refill, take your time. Rushing this step often leads to costly mistakes. And for peace of mind, consider recording the refill process for future reference or for a trusted mechanic to review, especially if you plan to perform regular maintenance on your own.
6. Test Drive and Final CVT Fluid Level Check to Confirm Everything Is Done Right
With the new CVT fluid in and the transmission sealed, it’s time for the most important part: the test drive. This isn’t just about seeing if the car moves—it’s about evaluating whether the transmission is responding smoothly, efficiently, and without delay. A successful test drive confirms that your refill was accurate and that no mechanical issues were introduced during the fluid change.
Start the engine and let it idle for 2–3 minutes. Then, while keeping your foot on the brake, shift slowly through each gear (P-R-N-D-L), holding each position for 2–3 seconds. This step helps distribute the new fluid throughout the valve body and torque converter. Listen for unusual sounds like whining, clunks, or hesitation—that could signal low fluid or an air pocket in the system.
Now, take the car for a 10–15 minute test drive on both city streets and highways. Pay attention to:
- Smooth acceleration and deceleration
- Stable RPMs during cruising (no surging or erratic behavior)
- Responsive gear transitions (no jerking or hesitation)
- No unusual vibrations when shifting or idling
After the drive, return to your workspace, keep the engine running, and recheck the fluid level (if your Nissan has a dipstick). The transmission should now be at operating temperature. If your level reads slightly low, add small amounts—about 100ml at a time—until it hits the proper mark. Be cautious not to overfill.
For models without a dipstick, you may need to remove the fluid level check plug (usually a small bolt near the drain plug) while the engine is running and the car is level. If a small stream of fluid trickles out, your level is good. If nothing comes out, you’re low and need to add fluid.
If everything checks out, congratulations—you’ve successfully changed your Nissan CVT fluid at home. But your job doesn’t end there. Over the next few days, monitor for any warning lights or changes in performance. It’s also a good idea to check underneath your vehicle for any signs of leaks.
And remember: if you experience anything odd like jerking after a fluid change, Nissan Nation Podcast’s article on what to do when your car jerks after CVT fluid replacement is a must-read for troubleshooting.
7. Frequently Asked Questions About Nissan CVT Fluid Change
1. How often should I change my Nissan CVT fluid?
For most Nissan vehicles, the recommended interval is every 60,000 to 90,000 miles. However, if you frequently drive in hot climates, tow heavy loads, or face stop-and-go traffic, it’s smart to change it closer to 60,000 miles. Always refer to your owner’s manual for model-specific guidance.
2. Can I use any CVT fluid, or does it have to be NS-2 or NS-3?
You should only use the fluid type specified by Nissan for your model. NS-2 and NS-3 fluids are designed with specific friction and temperature properties that match your transmission’s internal components. Using universal or non-approved fluids can lead to poor performance and even long-term damage.
3. What are the symptoms of low or old CVT fluid?
Some of the most common signs include:
- Jerking or hesitation during acceleration
- Whining or humming noises from the transmission
- Overheating
- Sluggish response when shifting gears
- Check engine or transmission warning lights
If you notice any of these after a fluid change, it’s worth reviewing this troubleshooting guide on post-service jerking from Nissan Nation Podcast.
4. Do I need to change the CVT filter every time I change the fluid?
Not necessarily. If you’re just doing a drain and fill every 60,000 miles, the filter can often last through multiple intervals. However, replacing it every 100,000 miles is a smart preventative measure—especially if your model has an internal screen or if you’ve experienced harsh shifting.
5. Can I overfill CVT fluid? What happens if I do?
Yes, overfilling is just as harmful as underfilling. Excess fluid can foam, causing erratic shifting, overheating, and pressure issues within the transmission. Always measure how much fluid you drained and aim to refill the same amount—then check the level at operating temperature to confirm.
6. Is a full flush better than a simple drain and fill?
A full flush replaces nearly 100% of the fluid, while a drain and fill typically replaces only 40–60%. However, flushing can dislodge debris and strain older transmissions. For high-mileage vehicles, it’s safer to do multiple drain-and-fill cycles over time instead of one aggressive flush.
7. Why doesn’t my Nissan have a dipstick? How do I check fluid level?
Some newer models removed the CVT dipstick to reduce user error. To check the level, you’ll need to:
- Warm the transmission to operating temperature
- Remove the check plug underneath the car
- Ensure a small amount of fluid drips out while the engine is running and car is level
Final Thoughts – Save Money, Gain Confidence, and Extend Your Nissan’s Life
Changing your Nissan’s CVT fluid at home isn’t just a weekend project—it’s a smart investment in your vehicle’s long-term performance and reliability. With just a few tools, some attention to detail, and the right fluid, you’ve taken a crucial step in preventing transmission failure, improving driving smoothness, and saving hundreds of dollars in dealership labor.
Let’s recap: you learned how to identify the right CVT fluid type, safely drain and refill your transmission, optionally replace the filter, and verify fluid levels like a pro. You now understand when to service your CVT, what symptoms to watch for, and how to avoid common mistakes that lead to costly repairs.
If this guide helped you, or if you’re planning to maintain your Nissan more regularly, check out Nissan Nation Podcast’s in-depth resources on transmission fluid capacities and real-world CVT problem stories. Staying informed is your best defense against unexpected repairs.
Ready to go deeper?
- Bookmark this guide for your next maintenance cycle
- Share it with a fellow Nissan owner who’s hesitant to DIY
- Subscribe to Nissan Nation Podcast for updates on service tips and model-specific advice
Now it’s your turn:
Have you ever changed your CVT fluid yourself? Did you notice smoother driving afterward—or run into challenges? Let us know in the comments.